
96 lines
4.3 KiB
Plaintext
96 lines
4.3 KiB
Plaintext
---
|
||
title: "Architecture to run 100 stripe cases in 1 endpoint"
|
||
description: "Handling stripes upgrades, downgrades, schedules, one off and subscriptions all in 1 endpoint."
|
||
date: "2025-06-11"
|
||
author: "Ayush, Autumn Co-Founder"
|
||
slug: "attach"
|
||
image: "/images/blog/attach.png"
|
||
featured: true
|
||
---
|
||
|
||
We’re building an engine to run software pricing models. Something we still struggle to conceptualize is the number of cases that need to be handled. Take some common examples and how you’d do it in Stripe:
|
||
|
||
**Scenario**
|
||
|
||
**Endpoint**
|
||
|
||
Upgrading a subscription
|
||
|
||
`POST /subscriptions/:subscription_id`
|
||
|
||
Scheduling a downgrade
|
||
|
||
`POST /subscription_schedules`
|
||
|
||
Creating a checkout session
|
||
|
||
`POST /checkout/sessions`
|
||
|
||
Creating a new subscription (if card is on file)
|
||
|
||
`POST /subscriptions`
|
||
|
||
Creating a one off payment
|
||
|
||
`POST /invoices/:invoice_id/pay`
|
||
|
||
There are more complex scenarios that require updating individual items within a subscription (eg. decrease the price of a metered feature when upgrading).
|
||
|
||
Stripe’s low-level design maps each action to a different function. When designing Autumn, we were pretty strong in our belief that all these cases should just be 1 endpoint: `POST /attach`
|
||
|
||
Initially we just handled basic cases, so a set of if else statements was enough. As we’ve started handling more cases, the if else spaghetti was becoming a nightmare of bugs. We spent last week rewriting the architecture into 5 steps so we can handle it more logically.
|
||
|
||
### Step 1: Input validation and parsing
|
||
|
||
This is the body that the `/attach` request takes in, and handles all request related errors. We use Zod to parse the overall schema, then use it’s `refine` method for more granular error throwing (eg if conflicting fields are passed in).
|
||
|
||
### Step 2: Building the AttachContext
|
||
|
||
Using the inputs, we then make all the DB queries and calculations we need to gather the necessary data. These include:
|
||
|
||
1. The product data → it’s prices and features it gives access to
|
||
|
||
2. The customer data → Their current product, existing configuration, payment method details
|
||
|
||
3. Data from the request body → eg. checkout session params
|
||
|
||
|
||
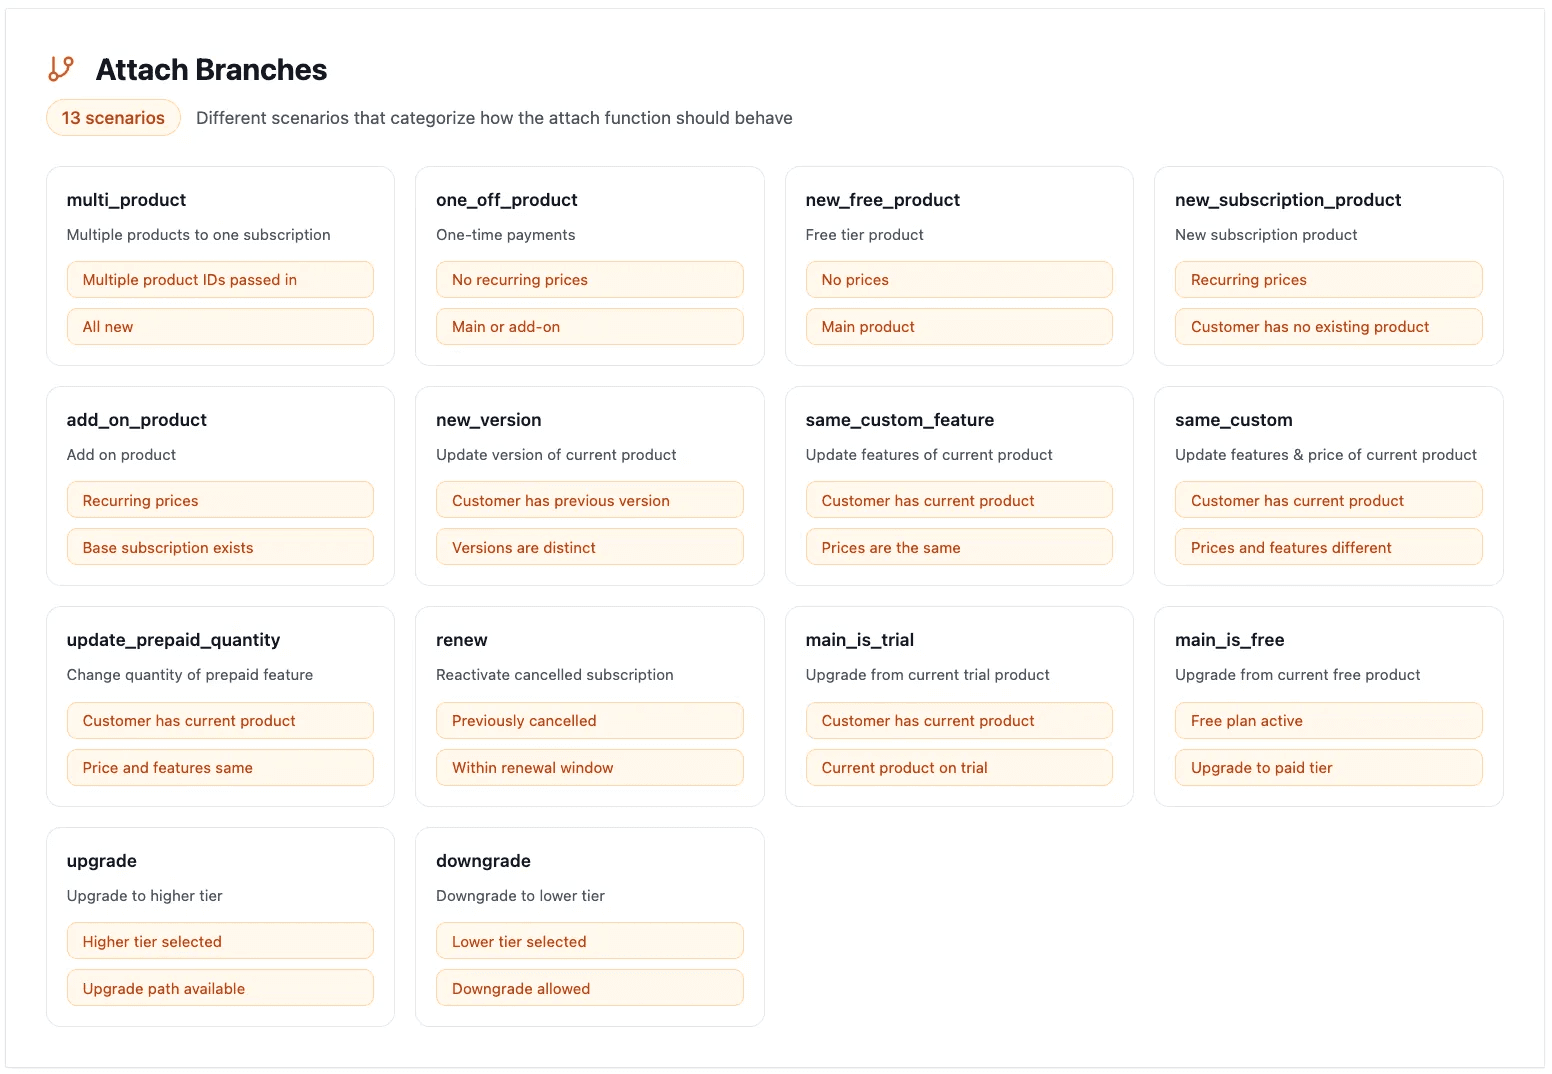
### Step 3: AttachBranch
|
||
|
||
This step is a first order categorisation of the `/attach` function based on the request body and context.
|
||
|
||
In our previous architecture, interpretability was a mess. We had our branching logic in multiple files and no concrete control / understanding of which path attach runs given the inputs.
|
||
|
||
We realised that different branches could be run through the same function. For instance, add ons and new subscription products branches, while separate scenarios, can now both be routed to the same `addProduct` function (see step 5). However they can also be routed to `createCheckout` depending on the config params in the next step.
|
||
|
||
|
||
|
||
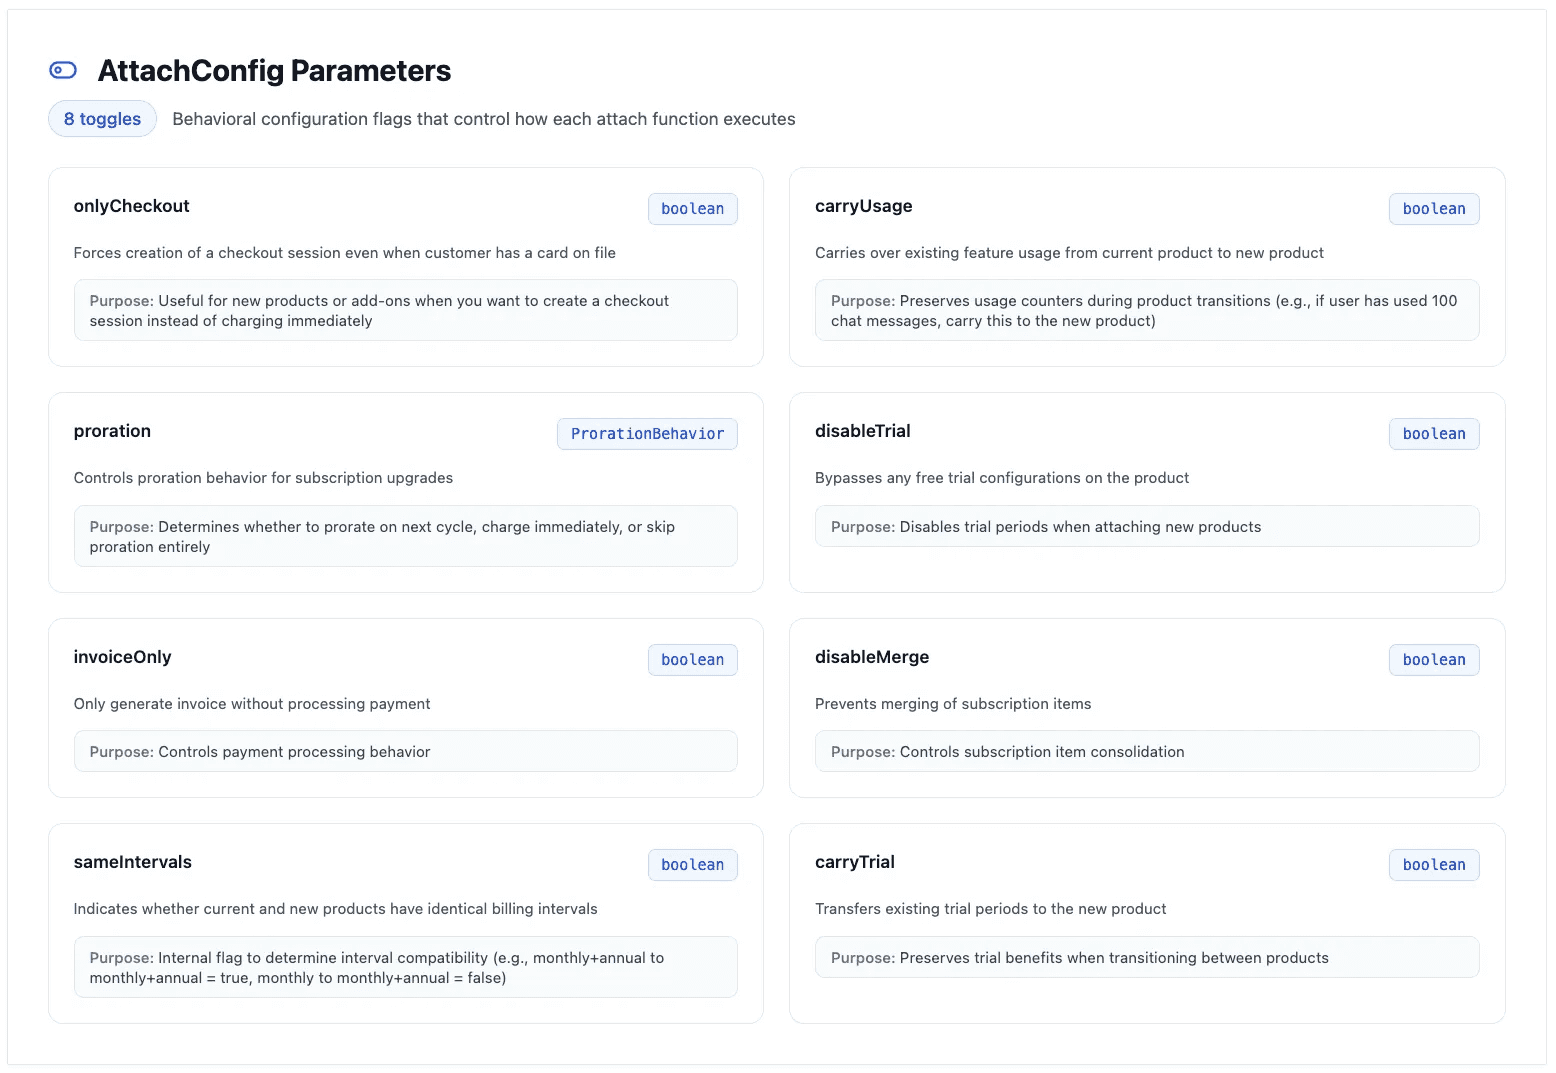
### Step 4: AttachConfig
|
||
|
||
These are a set of parameters that control the specific behavior of the product enablement. They have default values determined by the previous stages of the pipeline.
|
||
|
||
For instance, we can control:
|
||
|
||
- whether an upgrade is prorated, or charged in full
|
||
|
||
- whether a new product should create a checkout session, charge a default payment method or just generate an invoice
|
||
|
||
- whether any existing meter usage should carry over to the new product, or be reset
|
||
|
||
|
||
|
||
|
||
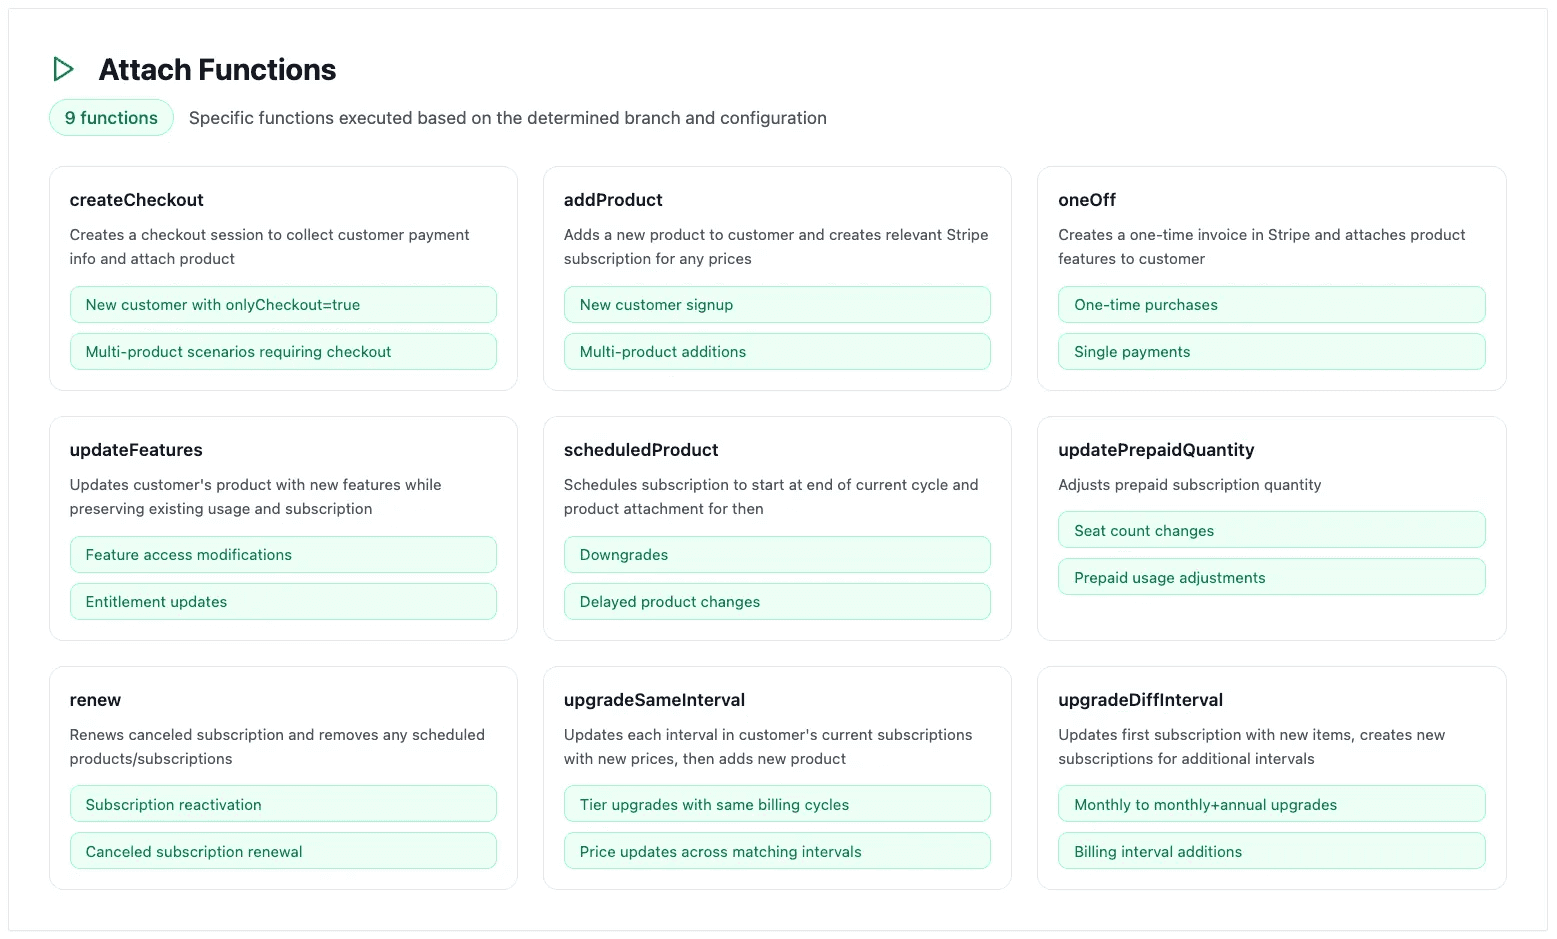
### Step 5: AttachFunction
|
||
|
||
The last step of the attach call is to determine which function to run, based on all of the prior categorisations. We referred to this in the AttachBranch step.
|
||
|
||
For instance, updating a custom product and upgrading to a new product technically can go through the same function, just with different configs (eg. proration behavior), and therefore can be routed to the same function — “UpdateProduct”
|
||
|
||
|
||
|
||
Then within each attach function, we make all the relevant calls to Stripe to ensure the scenario occurs successfully.
|
||
|
||
And then of course for each of these cases, you need to handle the downstream logic of actually giving the customer what they’ve paid for, which usually involves listening to webhooks, updating some permissions and maybe reseting usage limits.
|
||
|
||
We made that into another endpoint (`check`)… but that’s a story for another day.
|